Why Old Chimney Cleaning is Critical for Your Home's Safety
Old chimney cleaning is essential for preventing dangerous chimney fires that can reach temperatures up to 2,000°F and protecting your family from carbon monoxide poisoning. Vintage chimneys require special attention due to their age and unique construction challenges.
Quick Answer for Old Chimney Cleaning:
- Clean when creosote buildup reaches 1/8 inch thick (about the thickness of a nickel)
- Schedule annual inspections - NFPA and CSIA recommend yearly checkups
- Use proper tools - metal brushes for clay liners, plastic brushes for metal liners
- Watch for warning signs - smoky odors, poor draft, or slow-burning fires
- Consider professional help for heavy, tar-like creosote or structural concerns
Creosote, the flammable tar-like substance that builds up inside chimneys, ignites at just 451°F. As one professional chimney sweep noted, they may see "40 to 50 chimney fires a year" - many of which could have been prevented with regular cleaning.
Older chimneys face unique challenges including deteriorating mortar, cracked clay liners, and decades of accumulated buildup. These vintage systems often lack modern safety features, making regular maintenance even more critical.
The good news? With the right knowledge and tools, you can keep your vintage chimney safe and functional for years to come.
I'm Tony Lara, and my experience in the HVAC field has shown me how proper maintenance prevents costly emergencies. Through my work helping homeowners with heating system issues, I've seen how old chimney cleaning and regular maintenance can prevent dangerous situations and keep families safe.
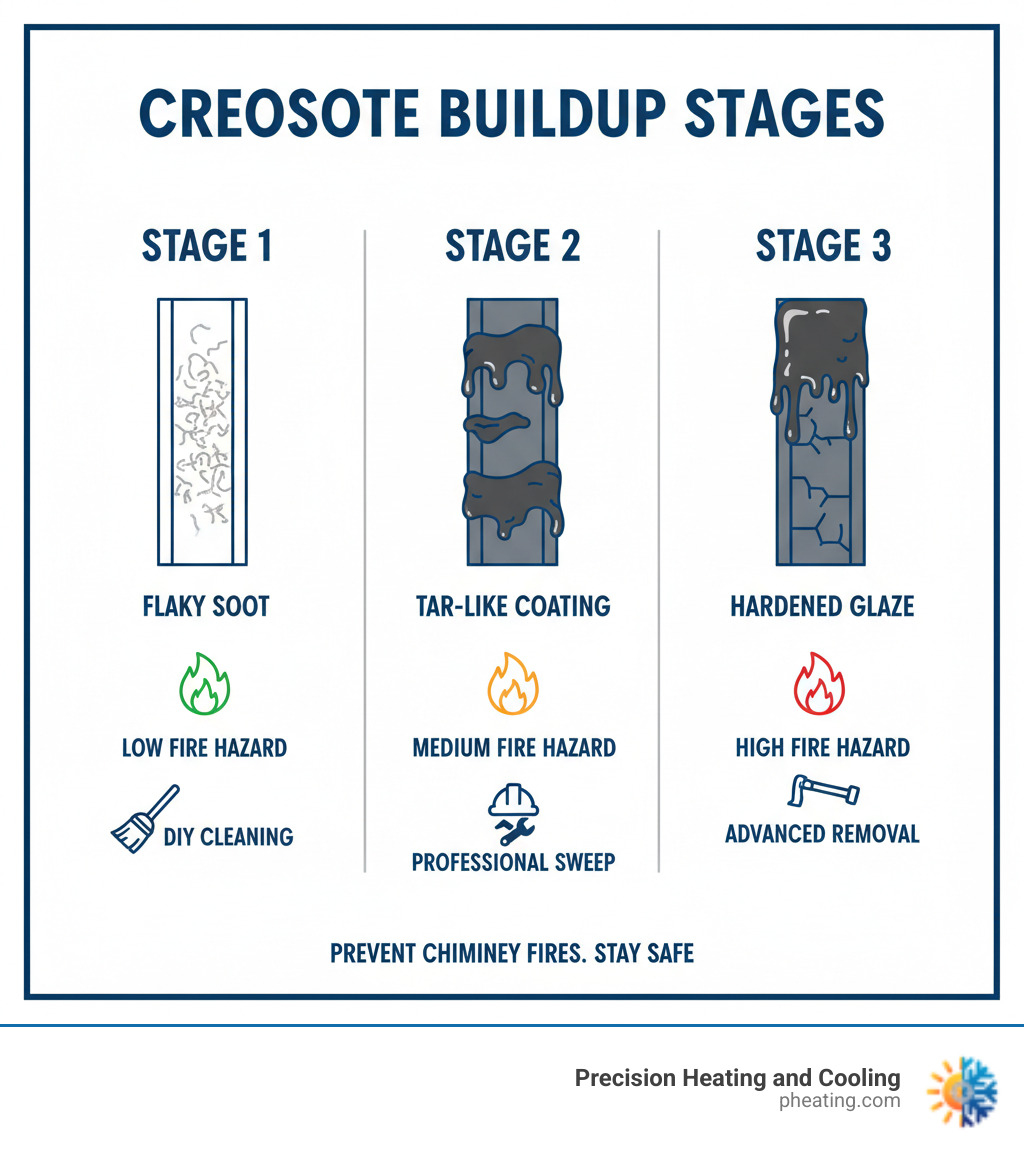
Recognizing the Red Flags: When Your Vintage Chimney Needs a Sweep
Picture this: you're looking forward to a relaxing evening by the fire, but instead of cozy warmth, you're greeted by smoke billowing into your living room or a strange, acrid smell that just won't go away. These aren't just annoying inconveniences – they're your vintage chimney's way of sending an SOS signal.
Understanding these warning signs can mean the difference between a safe, enjoyable fireplace experience and a dangerous situation that puts your family and home at risk. Let's explore what your chimney might be trying to tell you.
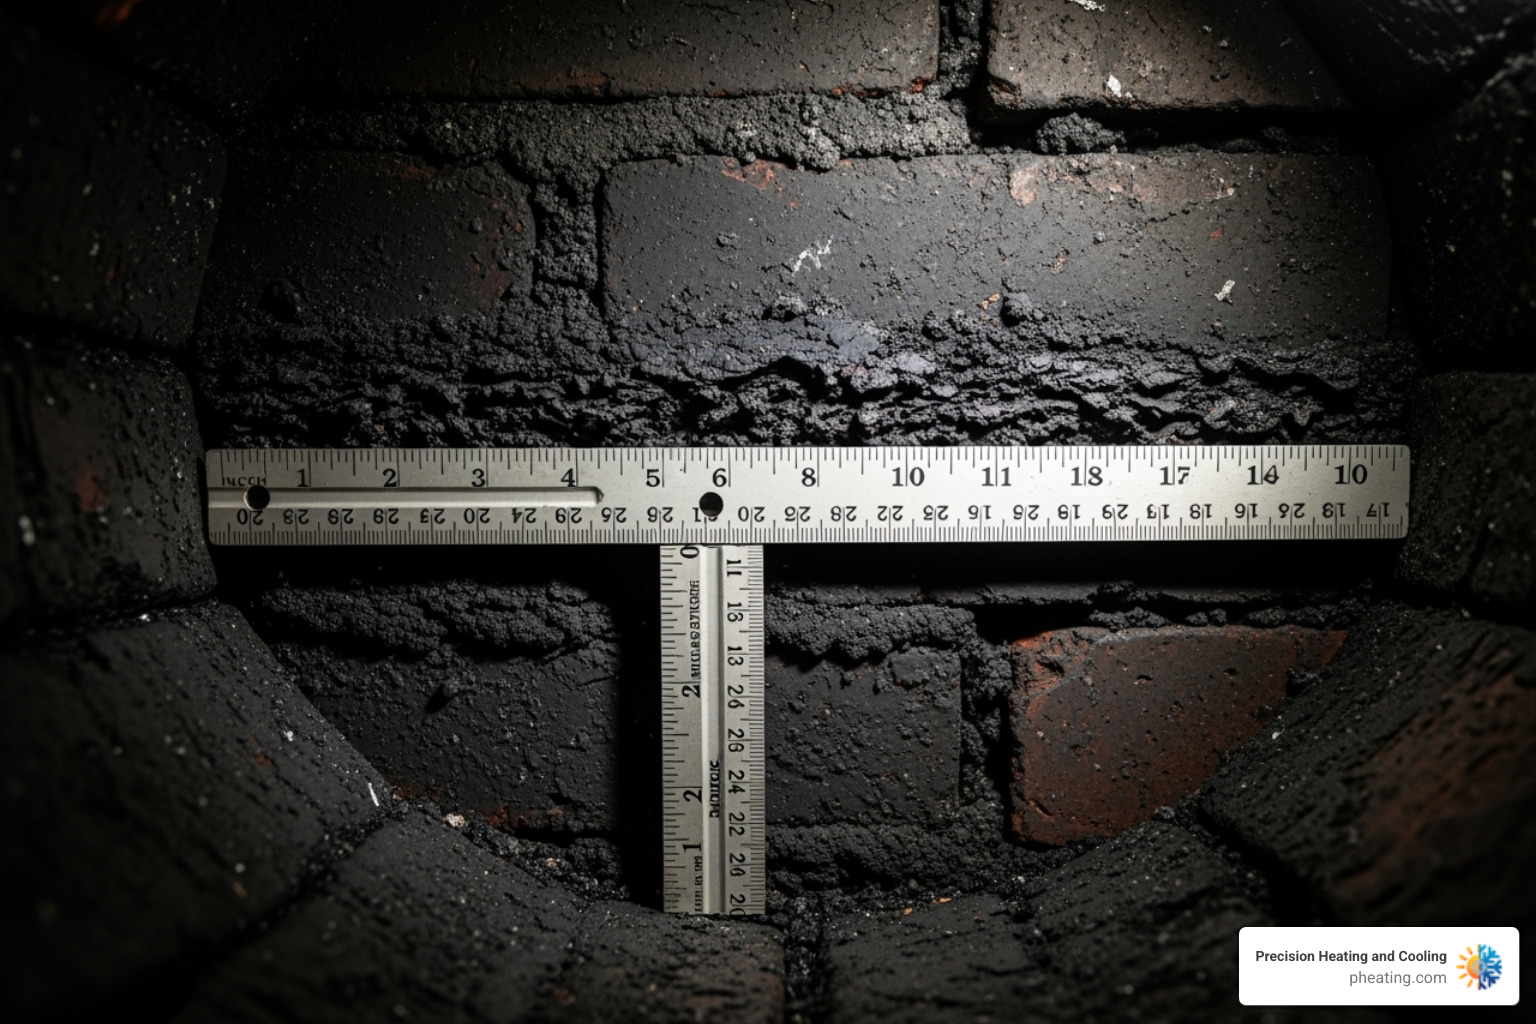
What is Creosote and Why is it Dangerous?
Think of creosote as the villain in your chimney's story. This tar-like byproduct forms when wood doesn't burn completely, especially when you're burning wet or green wood. As the smoke rises through your cooler chimney, those unburned particles condense and stick to the flue walls like a dark, crusty coating.
Here's what makes creosote so dangerous: it's essentially fuel waiting for a spark. This flammable substance ignites at just 451°F – not very hot by fireplace standards. Once it catches fire, things get serious fast. A chimney fire can reach temperatures of 2,000°F, hot enough to crack your flue liner, damage your chimney structure, or even spread to your house.
The scary part? Many homeowners don't realize how much creosote has built up until it's too late. Regular old chimney cleaning removes this fire hazard before it becomes a real problem.
Key Signs Your Chimney Needs Cleaning
Your vintage chimney is actually pretty good at communicating when something's wrong – you just need to know what to look for. Here are the most important warning signs that shouldn't be ignored:
Visible buildup is your most obvious clue. Grab a flashlight and take a peek up your flue. If you see black, flaky, or tar-like material that's 1/8 inch thick (about as thick as a nickel), it's definitely time for cleaning. This measurement isn't arbitrary – it's the point where creosote becomes a serious fire risk.
Strange smells often signal trouble brewing. A persistent smoky odor in your home when the fireplace isn't being used usually means creosote is seeping through your chimney walls. During a fire, if you're getting more smoke in your room than up the chimney, that's your flue telling you it's blocked.
Poor draft and inefficient fires are telltale signs of obstruction. When creosote builds up, it narrows your chimney's opening, making it harder for smoke to escape. Your fires will struggle to get going, burn slowly, and produce more smoke than heat. It's like trying to breathe through a straw – everything becomes much harder.
Damper problems can also indicate buildup. If your damper is sticky, hard to open, or won't close properly, creosote might be interfering with its movement. A properly functioning damper is crucial for both safety and efficiency.
Animal nests and debris create dangerous blockages. If you hear scratching, chirping, or see twigs and leaves falling into your firebox, you've got uninvited guests. Birds, squirrels, and other animals love to make homes in chimneys, especially during warmer months. These blockages can lead to carbon monoxide backing up into your home – a silent but deadly threat.
Don't wait to address these warning signs. The sooner you tackle them, the safer your fireplace will be. For more detailed information about when to schedule cleaning, check out Reasons to Schedule a Chimney Cleaning.
How Often Should You Clean an Old Chimney?
The "how often" question doesn't have a one-size-fits-all answer, but there are some reliable guidelines that can keep you on the right track.
The annual inspection rule is non-negotiable. Both the National Fire Protection Association (NFPA) and the Chimney Safety Institute of America (CSIA) recommend yearly inspections for all wood-burning fireplaces and stoves. Think of it like an annual physical for your chimney – even if everything seems fine, a professional eye can spot potential problems before they become expensive emergencies.
For actual cleaning, the 1/8-inch buildup rule is your measuring stick. Whenever creosote reaches this thickness, it's time for a thorough cleaning, regardless of when you last had it done.
Usage frequency plays a big role in how often you'll need cleaning. If you're burning fires three or more times a week during heating season, you're likely looking at more frequent cleanings than someone who only lights an occasional weekend fire. Heavy use simply means faster creosote accumulation.
Fuel type impact can't be ignored either. Burning softwoods like pine or fir, which are loaded with resin, creates more creosote than burning well-seasoned hardwoods like oak or maple. If you're primarily burning softer woods, expect to need old chimney cleaning more often.
Even gas and oil appliances need attention. While they don't produce the same creosote buildup as wood, they create corrosive byproducts that can damage your chimney over time. The CSIA recommends annual inspections for these systems too.
The bottom line? Start with an annual inspection, and let a certified professional assess your specific situation. They can recommend the right cleaning schedule based on how you use your fireplace and what you're burning. It's a small investment that can prevent major headaches down the road.
The Cleaning Process: A Step-by-Step Guide for Old Chimney Cleaning
You've spotted the warning signs, and your vintage chimney is practically begging for attention. Now comes the moment of truth: getting down to business with the actual cleaning. Whether you're rolling up your sleeves for a DIY adventure or weighing the pros and cons of professional help, understanding the old chimney cleaning process will help you make the right choice for your home.
The good news is that chimney cleaning, while messy, follows a pretty straightforward process. You can tackle it from the top-down method (starting at the chimney top and working down) or the bottom-up method (working from your fireplace up through the flue). Most professionals prefer the top-down approach because gravity helps pull debris down, but your comfort level with roof work might make the bottom-up method more appealing.
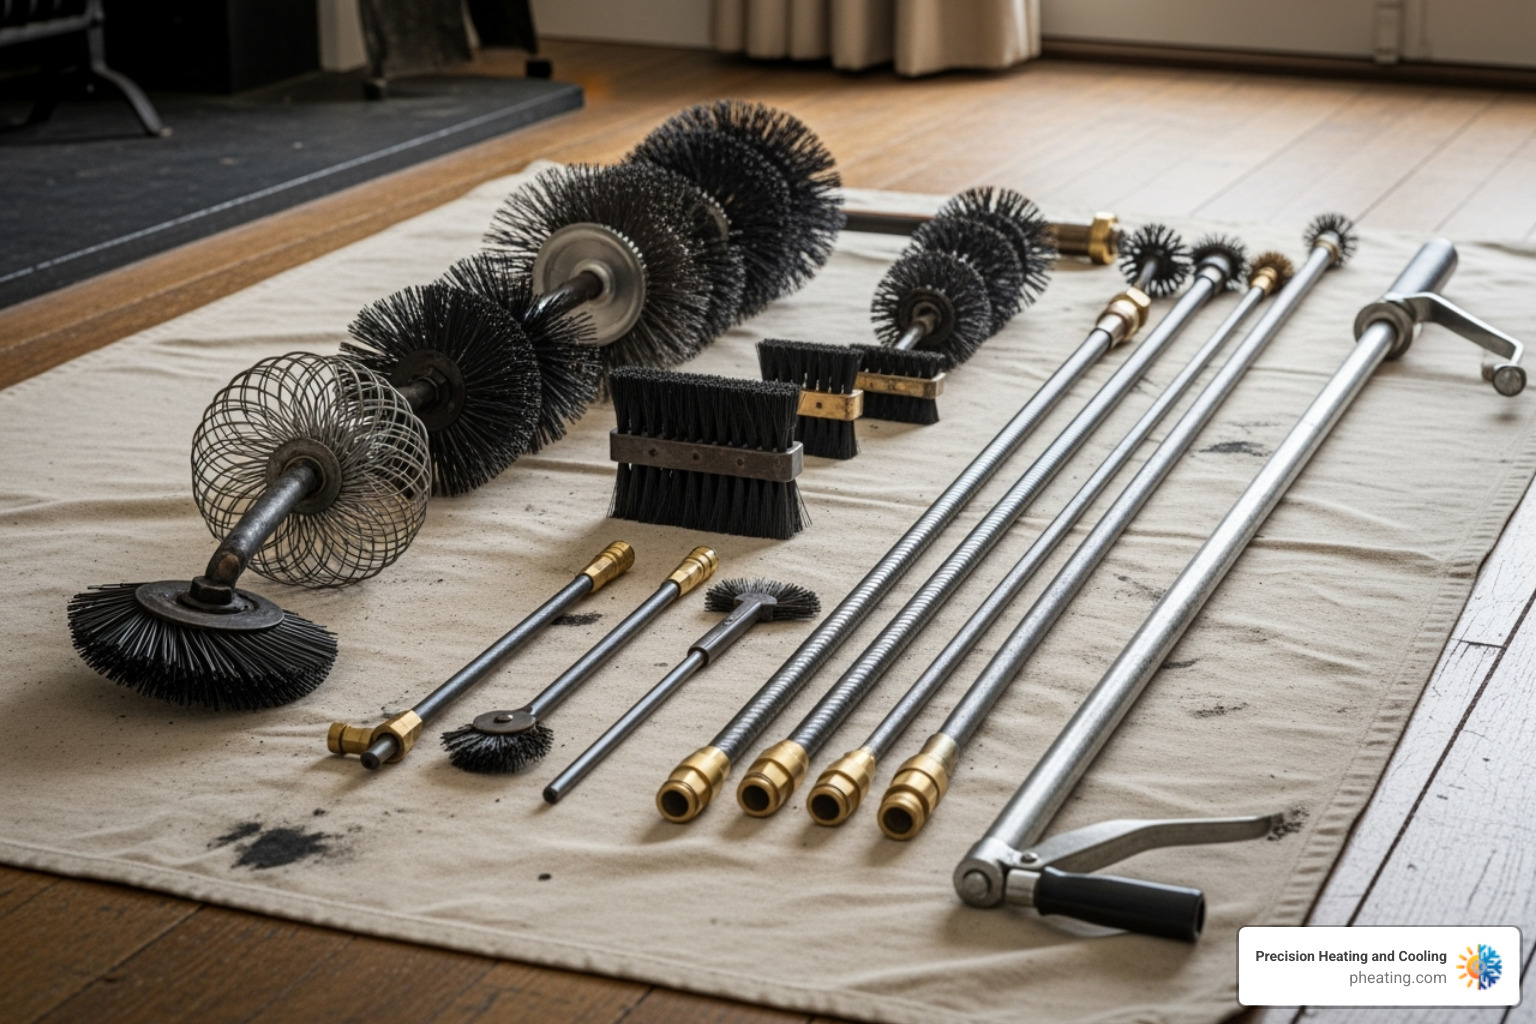
DIY Old chimney cleaning: Tools and Preparation
Before we dive into battle against decades of soot and creosote, let's talk about assembling your cleaning arsenal. Think of this as preparing for a very dusty, very important mission. Having the right tools makes the difference between a successful cleaning and a frustrating, messy disaster.
Your most important tool is the chimney brush, and choosing the right one depends entirely on what's inside your flue. For traditional clay flue liners found in most vintage chimneys, you'll want a metal bristle brush that can scrape away stubborn creosote buildup. But if your old chimney has been updated with a metal liner, switch to a plastic or poly brush to avoid scratching that expensive liner. Make sure your brush matches your flue's shape too – they come in round, square, and rectangular versions.
You'll also need flexible rods that screw together, allowing you to extend your brush through the entire height of your chimney. A shop vacuum with a HEPA filter is absolutely essential for cleanup, and don't forget your goggles and respirator – trust me, you don't want to breathe in decades of accumulated soot.
Drop cloths are your living room's best friend during this process. Lay them generously around your fireplace and floor because soot has a sneaky way of getting everywhere. A good flashlight helps you inspect your progress, while duct tape and poly sheeting create a crucial barrier to seal off your fireplace opening.
Before you start scrubbing, preparation is everything. Clear the area around your fireplace completely – move furniture, rugs, and anything else you treasure away from the potential soot zone. Remove all ashes from the firebox and make sure your damper is fully open. Then comes the critical step: sealing your fireplace opening with that poly sheeting and tape. This prevents your living room from looking like a coal mine when debris starts tumbling down.
Safety First: Essential Precautions
When it comes to old chimney cleaning, safety isn't negotiable – it's the foundation of everything we do. Working with heights, decades of accumulated soot, and potential fire hazards means taking every precaution seriously.
Your Personal Protective Equipment (PPE) is non-negotiable. Always wear goggles, a quality dust mask or respirator, and gloves. Soot isn't just dirty – it's irritating to your skin, eyes, and lungs. If you're cleaning from the top, roof safety becomes paramount. Never venture onto your roof alone, and ensure your ladder is stable and extends at least three feet above the roof edge.
Here's where many DIYers need to be honest with themselves: if you're uncomfortable with heights or your roof is particularly steep or slippery, that's your cue to call in the professionals. A fall from a roof can be life-changing, and no amount of money saved is worth that risk.
Ladder stability deserves special attention. Use a sturdy ladder and have a partner steady it for you. Working with a partner isn't just about safety – they can hand you tools, monitor your progress, and provide that extra set of eyes that often spots potential problems.
Even with your fireplace sealed, expect some dust to escape. Keep nearby windows closed and consider venting your shop vacuum hose outdoors if possible. The goal is containing the mess while protecting your home's air quality.
For more insights on maintaining a safe home environment, you might find our article on Dryer Vent Cleaning for Home Safety helpful, as it emphasizes how proper maintenance prevents dangerous situations.
When to Call a Pro for Old chimney cleaning
While there's something satisfying about tackling a DIY chimney cleaning project, wisdom sometimes means knowing when to set down your brush and pick up the phone. Certain situations absolutely call for professional expertise, and recognizing these scenarios can save you time, money, and potentially prevent dangerous mistakes.
Heavy, tar-like creosote – what professionals call Stage 3 or glazed creosote – is beyond most DIY capabilities. If your inspection reveals shiny, hardened buildup that looks more like black glass than fluffy soot, you're dealing with the most dangerous type of creosote. This stuff requires specialized tools and chemicals that most homeowners don't have access to.
Suspected structural damage is another clear signal to call in the experts. Cracks in the flue liner, crumbling mortar, loose bricks, or any signs of deterioration need professional assessment. A certified chimney sweep can identify problems you might miss and recommend repairs before they become expensive emergencies.
Don't feel embarrassed about being uncomfortable with heights – it's actually smart self-awareness. Professional sweeps have the training, experience, and equipment to work safely on challenging roofs. They also know how to spot subtle issues that could compromise your chimney's safety.
If you lack the proper tools or feel uncertain about the process, hiring a professional often makes financial sense. Acquiring all the right brushes, rods, and safety equipment for your specific chimney can be a significant investment, especially for a job you might only do once or twice.
After a chimney fire – even a small, quiet one – never use your fireplace again until a professional has inspected it thoroughly. Hidden damage from chimney fires can compromise your chimney's structural integrity in ways that aren't immediately obvious.
Professional chimney sweeps bring more than just tools and experience – they understand local codes, can spot potential problems before they become emergencies, and provide the peace of mind that comes with expert service.
For homeowners in the San Jose Bay Area and Central Valley, our team at Precision Heating and Cooling brings over two decades of experience to every old chimney cleaning project. If you're facing any of these situations or simply prefer professional expertise, check out our Chimney Cleaning Services in San Jose, CA.
Beyond the Sweep: Long-Term Maintenance for Your Vintage Chimney
Getting your old chimney cleaning done is just the beginning of a beautiful relationship with your vintage fireplace. Think of it like maintaining a classic car – the real magic happens with consistent, thoughtful care that goes far beyond the occasional tune-up. Your chimney has served homes for decades, and with the right approach, it can keep your family warm and safe for many more years to come.
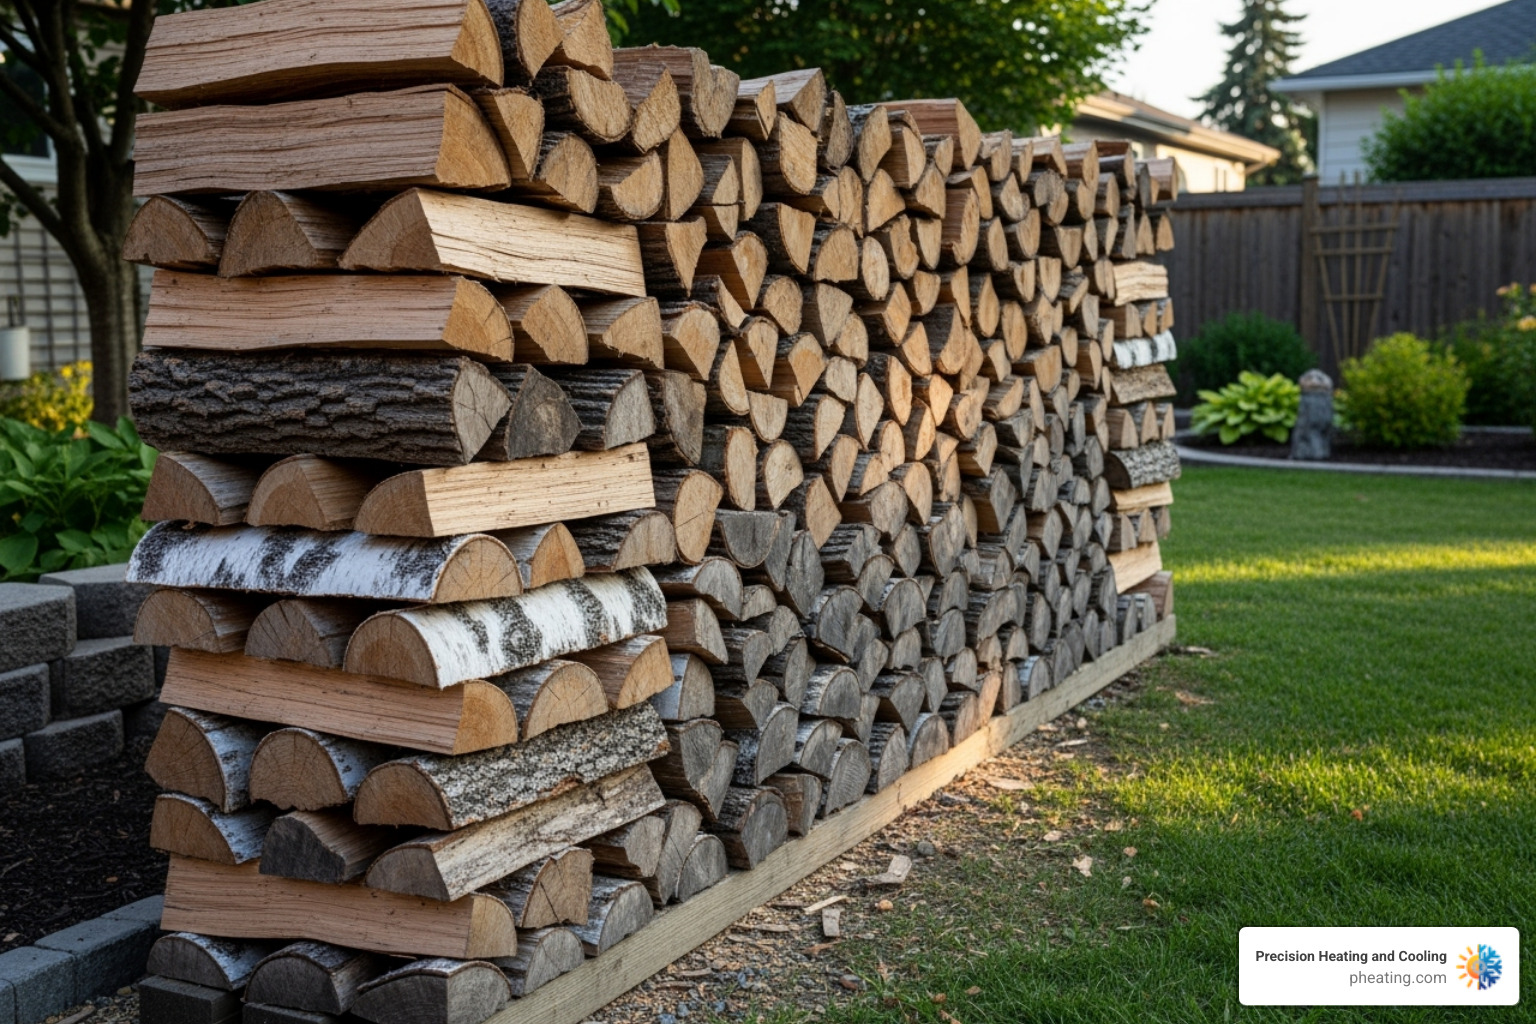
Preventing Excessive Creosote Buildup
The secret to easier old chimney cleaning sessions? Stop creosote from building up so quickly in the first place! It's like eating your vegetables – a little prevention goes a long way toward avoiding bigger problems down the road.
Burn seasoned, dry hardwood whenever possible. This single habit makes the biggest difference in your chimney's health. Well-seasoned wood that's been dried for at least 6-12 months burns hotter and cleaner, producing far less smoke and creosote. You'll know your wood is ready when it feels lighter, has cracks in the ends, and makes a sharp "crack" sound when two pieces are knocked together.
Green or wet wood is your chimney's worst enemy. It burns cool and smoky, sending tons of unburned particles up your flue where they stick to the walls as creosote. If your wood hisses, sizzles, or smells sappy when burning, it's telling you it's too wet to use safely.
Ensure proper airflow by opening your damper fully during fires. Your fire needs to breathe! Good airflow creates hotter, cleaner burns that send smoke and gases quickly up the flue before they can cool and condense into that sticky creosote coating.
Build hotter, smaller fires rather than large, smoldering ones. A bright, dancing fire with minimal smoke coming from your chimney top is what you're after. Those slow, smoky fires might look cozy, but they're creosote factories working overtime.
Consider adding a chimney cap with mesh screening. This simple addition keeps rain and critters out while improving your chimney's draft and preventing downdrafts that contribute to creosote formation. For more details on keeping your entire system clean, our guide on Chimney Liner Cleaning covers another crucial maintenance area.
The Critical Role of Annual Chimney Inspections
Think of your annual chimney inspection as your fireplace's yearly physical exam. Even if you're diligent about cleaning and burning the right wood, having a professional look things over is absolutely essential for your family's safety.
Both the National Fire Protection Association (NFPA) and the Chimney Safety Institute of America (CSIA) strongly recommend annual inspections for all wood-burning systems. These aren't just suggestions – they're based on decades of research into what keeps families safe.
Spotting damage early is perhaps the biggest benefit of regular inspections. A trained eye can catch hairline cracks in flue liners, loose mortar joints, or early water damage that you'd never notice from ground level. Catching these issues early means smaller repairs instead of major reconstruction projects.
Ensuring safety goes beyond just looking for damage. Inspectors verify that your chimney is structurally sound, free of dangerous obstructions like animal nests, and venting properly to prevent carbon monoxide from entering your home.
Code compliance matters too, especially if you're planning to sell your home or make insurance claims. Professional inspections ensure your chimney meets current safety standards outlined in NFPA 211 standards.
Not all inspections are created equal. The NFPA and CSIA outline three distinct levels:
| Inspection Level | Description | When It's Needed |
|---|---|---|
| Level 1 (Visual) | Basic visual inspection of accessible areas, checking for proper clearances and basic functionality | Annual routine inspection for systems with no changes or problems |
| Level 2 (Real Estate Transaction/Appliance Change) | More thorough inspection including video scanning of flue interior, checking all accessible areas | When buying/selling a home, after chimney fires, or when installing new appliances |
| Level 3 (Intrusive) | Most comprehensive inspection that may require removing parts of the chimney structure to access hidden areas | When serious hazards are suspected or Level 2 inspection reveals potential problems |
Common Problems in Older Chimneys
Vintage chimneys have character, but they also come with unique challenges that modern systems don't face. Understanding these common issues helps you know what to watch for and when to call for help.
Cracked flue liners are extremely common in older chimneys. Clay tiles can crack from repeated heating and cooling cycles, while older chimneys might have deteriorated mortar joints between tiles. These cracks allow heat and dangerous gases to escape into your home's structure.
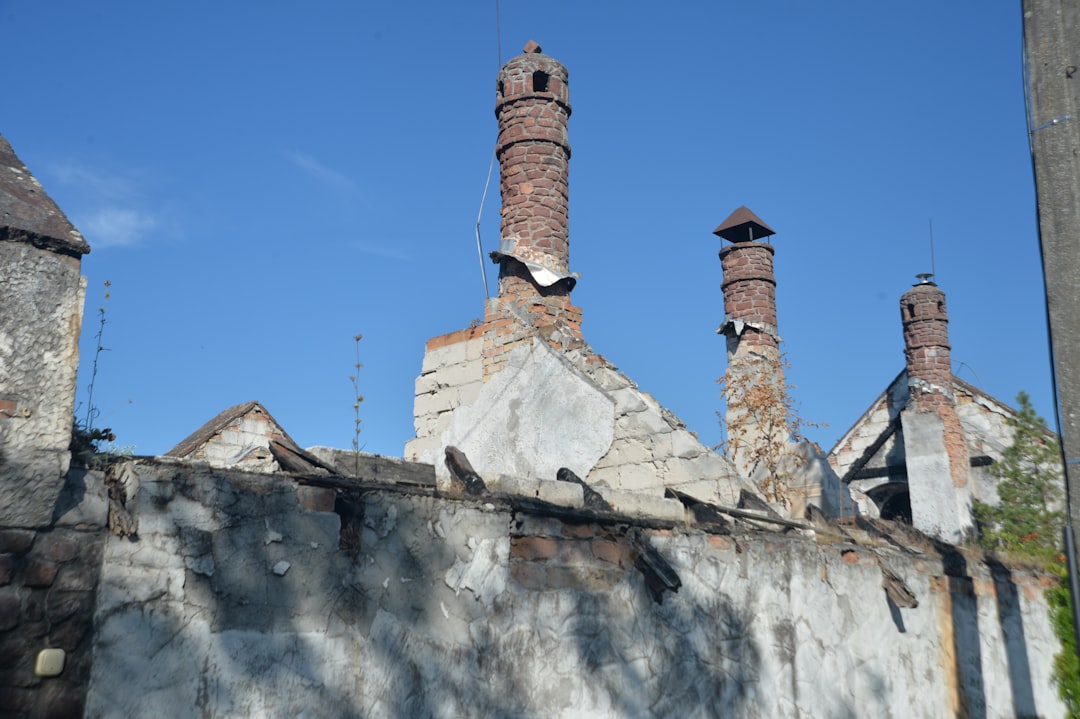
Spalling bricks occur when water gets into the masonry and freezes, causing the brick faces to pop off. You'll notice pieces of brick around your chimney's base or see areas where the brick surface looks rough and damaged.
Damaged mortar joints between bricks weaken your chimney's structure and allow water infiltration. Look for crumbling, missing, or loose mortar – it's often the first sign that your chimney needs attention.
Chimney crown cracks develop over time as the concrete cap on top of your chimney settles and weathers. These cracks let water pour directly into your chimney system, accelerating other damage.
Missing chimney caps leave your flue completely exposed to rain, snow, and animals. If you don't see a metal or concrete cover on top of your chimney, water is definitely getting inside and causing problems.
The good news? Most of these issues are manageable when caught early through regular inspections and maintenance. For comprehensive information on maintaining your entire home's air quality systems, check out our article on Regular Dryer Vent and Chimney Cleaning.
Your vintage chimney has stories to tell and warmth to give for many years to come. With consistent care, proper burning practices, and regular professional attention, you're not just maintaining a heating system – you're preserving a piece of your home's history while keeping your family safe and comfortable.

Flexible payment options to make your goals affordable and stress-free.

Keeping it Close: Local Heater Installation Services in Santa Clara
Heater Installation Without Breaking the Bank in Santa Clara


.avif)



.avif)